Posts

Showing posts from March, 2019

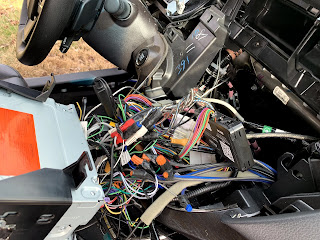
Pioneer Auto EQ Greyed Out, Not Selectable, Fix

The Pioneer Auto EQ function does add quite a lot to the experience of aftermarket car audio by measuring and analyzing specific sounds using an external microphone.  I found that the music is much better, but distortion started earlier at 30 versus 38 without Auto EQ. I had a difficult time getting the Auto EQ selectable, and found others had the same issue.  I spent some time researching the issue and found the solution for me was a specific set of procedures: Turn car to "accessory mode" Have handbrake used, or other bypass  Disconnect any phones from bluetooth and/or wifi connection, imperative.  Select "Source Off" (not power off) Go to the home screen  Then hit the gears, scroll to audio, then AutoEq and the ability to measure the system should be selectable  Items 3-5 are I believe crucial, I know items 4 and 5 are above.  Subtle but necessary.  

3 Tips for Toyota Avalon Speaker, Head Unit, and Amplifier Installatoon on 2013 2014 2015 2016 2017 2018 Toyota Avalons and Camry

While some of the other Avalon 2016 Audio System Install posts are somewhat general this is post is a very specific post about install tips for the Toyota Avalon, and likely Toyota Camry and regional derivatives. Toyota Avalon 2013 2014 2015 2016 2017 2018 Speaker Tip 1) You must remove the "a-pillars" to remove the speaker dash cover.  In order to do that you need to use needle nose pliers to remove a plastic tether which prevents or mitigates injury in-case the airbags behind the "a-pillar" detonate. Toyota Avalon 2013 2014 2015 2016 2017 2018 Head Unit Tip 2) There is plenty of room to the sides and beneath the plastic brace for extra wires and hideaway units such as the maestro adr-rr and XM svx-300.  Take out the glove compartment air filter cover to get access to part of the areas to route wires. Toyota Avalon 2013 2014 2015 2016 2017 2018 Amplifier Tip  3) The area for the firewall under the drivers side has wiring attached beneath the pedals. Wir

Avalon Amplifier and Headunit install photos

Image
5-channel amplifier install:  I ran the power cable through the driver's (USA) side firewall near the brakes , being careful to not let the cord interfere with the break pedal operation even under worst care scenarios.   I used the drivers side as the battery is on the driver's side and it is a fairly short run back.  I later did the 5-channel amp, and it was a lot of work. More than expected perhaps 5 or 6 hours over two days, an hour or two taking everything out that I have to.   Both kick panels utilize a plastic nut to fasten them.  Taking off the sides is a crucial first step to fishing cords from headunit to trunk.  Another hour or less to fish the power cable up to the battery which I ran on the drivers side to try to shorten the length of cable in the engine compartment. Then bringing that power cable back to the trunk via door sills.  I snapped the sills out and the pillar partially out. Front door sills have a bit of room for the powe

OEM vs Headunit Internal Amp vs External Class-D Amp

Image
OEM Headunit (Toyota Entune 2.0) vs Aftermarket (Pioneer Avic-w8400nex) Sound Quality This head unit, w8400nex, sounded quite a bit better than stock Toyota, much cleaner, flatter, and fuller spectrum of sound. The volume was quite a bit louder, and distorted at approximately 14-17 on the pioneer headunit. But it felt like the bass lacked dynamic response and the highs too lacked excitement.  Aftermarket head unit sounds much better with flatter cleaner signals. 

Complete upgrade of the 2013-2018 Toyota Avalon audio system

Image
As I mentioned in my post reflecting on the Wireless Apple CarPlay Experience , I finished upgrading my 2016 Toyota Avalon stereo with the addition of a wireless CarPlay and Android Auto Pioneer W8400NEX, a 5-channel infinity 4555a amplifier delivering an anticipated but not measured 260 watts RMS into the 4x Infinity Reference 3-way 6x9's and the 4 2-way Infinitey Reference 3.5" speakers that are located on the drivers door and rear deck, as well as the front dash and rear seats door panels respectively.  The subwoofer channel on the infinity 4555a amplifier was driving a newly added 2-ohm selected (4-ohm option) Infinity Kappa 1200 subwoofer with 500 watts rms. The 4555a seems much more sensitive on the 4-channel full spectrum side, or at least through the speakers tested, and  needed no increase in the gain vs. the subwoofer which was measured to clip, using the buzz method of listening at 100hz, at 1/3, or "10-clock position" on the gain dial  Also intere