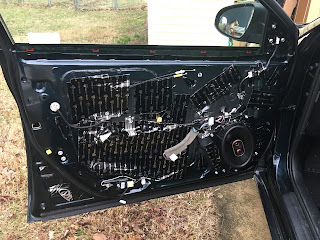
As I mentioned in my post reflecting on the Wireless Apple CarPlay Experience , I finished upgrading my 2016 Toyota Avalon stereo with the addition of a wireless CarPlay and Android Auto Pioneer W8400NEX, a 5-channel infinity 4555a amplifier delivering an anticipated but not measured 260 watts RMS into the 4x Infinity Reference 3-way 6x9's and the 4 2-way Infinitey Reference 3.5" speakers that are located on the drivers door and rear deck, as well as the front dash and rear seats door panels respectively. The subwoofer channel on the infinity 4555a amplifier was driving a newly added 2-ohm selected (4-ohm option) Infinity Kappa 1200 subwoofer with 500 watts rms. The 4555a seems much more sensitive on the 4-channel full spectrum side, or at least through the speakers tested, and needed no increase in the gain vs. the subwoofer which was measured to clip, using the buzz method of listening at 100hz, at 1/3, or "10-clock position" on the gain dial Also intere...


Comments
Post a Comment